
Time to Complete: Hmm, I would say a good 6 straight hours for one bed and then time to paint a few coats. Once you get the hang of it, it will go much more quickly. Not to mention, the countless trips to Menards and JoAnne's for forgotten items:)
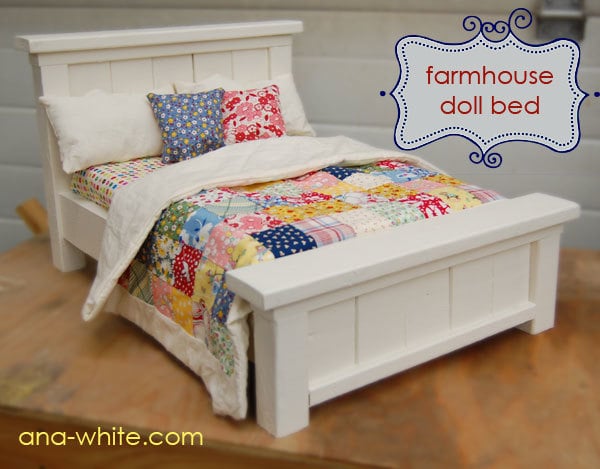

You could put the word "farmhouse" in front of most anything and I would love it. There's just something about that word that brings me back to a simpler time and style that I am attracted to. These are farmhouse beds on Ana White's blog that we'd like to make or buy from someone for our new home (that will be completed in June). Along with adult-size beds, she has also designed a bed made especially for dolls! We had already planned on surprising our two oldest girls with American Girl Dolls this year for Christmas, so a couple of weeks before Christmas I bought a chop saw for 25 bucks off of Craigslist and began the somewhat daunting task of making the adorable doll beds. I should have started much sooner than the week of Christmas but I saved this project for my last so that I could concentrate solely on the beds.
Materials: (taken from Ana White's blog)
Shopping List:
2x2 (3 feet total)
2 - 1x3s (10 feet total)
1 - 1x2 (8 feet total)
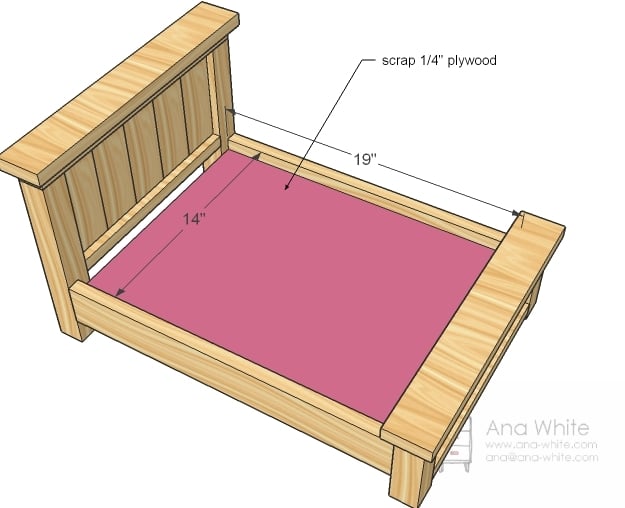
scrap 1/4" plywood (you could even use sturdy cardboard here)
1 1/4" Screws
2" Screws
Wood Glue
**I would also add 3/8" plywood to help with making the head and foot boards.
Tools:
measuring tape
square
pencil
safety glasses
hearing protection
drill circular saw
sander
countersink drill bit
Cut List:
5 - 1x3 @ 6" (Headboard Panel)
5 - 1x3 @ 3" (Footboard Panel)
2 - 2x2 @ 4 1/4" (Footboard Legs)
2 - 2x2 @ 11" (Headboard Legs)
2 - 1x2 @12 1/2" (Bottom of Panels)
2 - 1x2 @ 15 1/2" (Top of Panels)
2 - 1x3 @ 16 1/2" (Top of Headboard and Footboard)
2 - 1x3 @ 19" (Siderails)
2 - 1x2 @ 14" (Bed Frame) Or 3? Read instructions below to determine need.
** Things I Would Do Differently:
- Keep saw out and accessible to cut wood as you need it. As you get going, you may realize that you need your wood a hair shorter or longer. It will save you from having to cut wood twice during the process.
- Make sure everything is "square" before using wood glue...that stuff is sticky!!
- Sew more pillows for the bed. The bed is actually quite a bit wider than I had imagined. It is around 18" wide. I will be adding more pillows to the bed as I have time.
Time to Cut!! It was cold outside and in the garage so I brought
the wood inside to measure before cutting.


we couldn't figure out how to open it!

I can't even begin to describe how much fun it was to cut wood!
I think my Dad was a little nervous for me, but I was
determined to learn how to do it myself.

Carson showing me his drawing of a boat he wanted me to make.

There was sawdust EVERYWHERE!!


The pieces were so cute and tiny!

The following instructions are from Ana's blog with
some of my pictures added in.
Step One: The Panel
Line up your panel boards as shown below. Notice how I rested the boards on a piece of 3/8" plywood?

Step Two:
That's so you can easily line up the bottom panel board on center. Mark and predrill holes with a countersink bit into the bottom panel boards.


Step Three:
And screw the bottom panel boards to the panel, as shown above. Use wood glue and 1 1/4" screws.

with multiple hands.)

Step Four: Legs
Now attach the legs to the panel using 2" screws and glue. Be careful to screw into the panel boards and into the bottom.


(Yes, I wore my ugly red robe to work in....)
Step Five: Top of Panel
Now attach the top of the panel to the legs and each individual panel board.


Step Six: Top of Headboard
Finally, screw the top of the headboard to the headboard, centering on the headboard. You only need two screws and glue here.


Step Seven: Footboard
Now build the footboard just like the headboard.

Step Eight: Frame
Now screw the siderails to the frame as shown below. If you have a daughter that will try the bed out herself, you should also add an additional support beam in the center.
.jpg)
 |
I had to recruit my husband to help with the frame...this
was definitely the hardest part for me.
Everything must be completely square so that your
bed doesn't wobble!
Step Nine: Assembly
Now simply predrill holes and screw the frame to the headboard and footboard.
.jpg)
Step Ten: Platform
And just lay plywood on top.
Finishing Instructions:
I filled all the screws with wood filler and let dry. Sand with 120 grit sandpaper. Brush on primer and 2 coats of satin finish paint. (I used a paint that doubled as a primer/paint and brushed on 3 coats.)
 |
Painting in an unheated garage left my toes numb...ouch!

I used white wood filler on all of the screws.

I chose not to paint the plywood and have been happy
with that decision. No one sees it anyway once
the foam mattress pad is on.

This American Girl Doll and her bed had to join us in the
family room for a sibling sleepover! It warms my heart how much
they love these beds and I would do it again in a heart beat!
Let me know if you give it a try!
No comments:
Post a Comment